Set Up Your First Apache Beam Application (Java)
Overview
Data processing has become more and more important and there are so many tools for data processing jobs. Apache Beam supports both batch and streaming processing, both of which are important and necessary for many data-driven services.
For a complete beginner, it’s hard to start learning a new framework without an experience of setting up a simple “Hello World” application.
This post will cover how to create and run your first Apache Beam application in Java.
Tools
- Gradle: build tool
- VS Code for editor + Gradle for Java extension
Steps
1. Create a Gradle project
gradle initYou’ll be asked several questions. Here are the values that I used for my project.
- Select type of project to generate:
application - Select implementation language:
java - Split functionality across multiple subprojects?:
no - Select build script DSL:
Kotlin - Generate build using new APIs and behavior:
yes - Select test framework:
JUnit Jupyter - Project name:
apachebeamtraining - Source package:
apachebeamtraining
You can choose your preferred option.
Now you can run the Hello World application with the following command:
./gradlew run
Starting a Gradle Daemon, 3 incompatible Daemons could not be reused, use --status for details

> Task :app:run
Hello World!

BUILD SUCCESSFUL in 7s
2 actionable tasks: 2 executed
2. Update dependencies (app/build.gradle.kts)
Add the apache beam related dependencies (you can replace the version with the latest one) to dependencies
    // https://mvnrepository.com/artifact/org.apache.beam/beam-sdks-java-core
    implementation("org.apache.beam:beam-sdks-java-core:2.45.0")

    // https://mvnrepository.com/artifact/org.apache.beam/beam-runners-direct-java
    runtimeOnly("org.apache.beam:beam-runners-direct-java:2.45.0")
3. Write the first Apache Beam logic
Write the wordcount Apache Beam logic in src/main/java/apachebeamtraining/App.java:
public class App {
    public static void main(String[] args) {
        PipelineOptions options = PipelineOptionsFactory.create();
        // Create pipeline
        Pipeline p = Pipeline.create(options);
        // Read text data from Sample.txt
        PCollection<String> textData = p.apply(TextIO.read().from("Sample.txt"));
        // Write to the output file with wordcounts as a prefix
        textData.apply(TextIO.write().to("wordcounts"));
        // Run the pipeline
        p.run().waitUntilFinish();
    }
}
The steps are pretty simple:
- Create a PipelineOption.
- Create a Pipeline with the option.
- Add the logic to read data from
Sample.txtto the pipeline and get the return value asPCollection, which is an abstraction of dataset in Apache Beam. - Add another step to write the return value in the previous step to output file with name starting with
wordcounts. - Lastly, run and finish the pipeline.
Here we don’t dive into the details of DSL. You can check the details in programming guide.
You also need to import the dependencies to use PipelineOptions, Pipeline, etc.
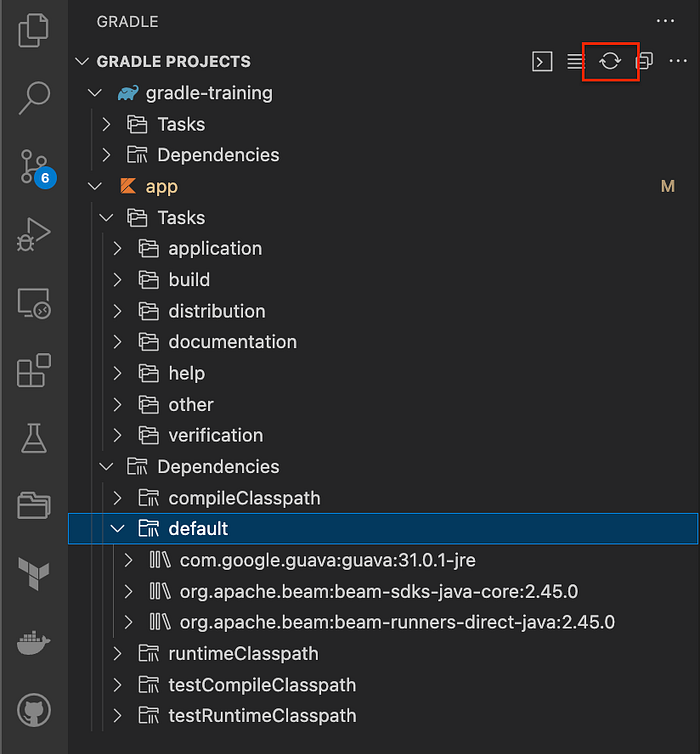
If you’re using VSCode, you can reload all the dependencies with Gradle extension in VSCode by clicking on the icon:
4. Prepare Sample.txt
Prepare Sample.txt in app directory. You can write any text in the file like the following:
This post will cover how to start creating your first Apache Beam application in Java.5. Run the first Apache Beam app
You can run the app by the command:
./gradlew run
Starting a Gradle Daemon, 4 incompatible Daemons could not be reused, use --status for details
> Task :app:run
SLF4J: Failed to load class "org.slf4j.impl.StaticLoggerBinder".
SLF4J: Defaulting to no-operation (NOP) logger implementation
SLF4J: See http://www.slf4j.org/codes.html#StaticLoggerBinder for further details.
BUILD SUCCESSFUL in 7s
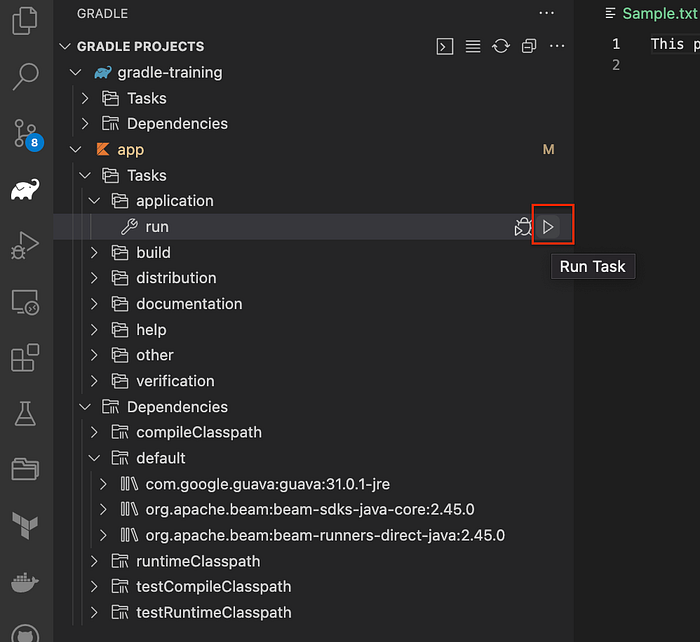
2 actionable tasks: 2 executedor you can also run by Gradle extension of VSCode:
Now you’ll find a new file app/wordcounts-00000-of-00001 , which contains exactly the same contents as app/Sample.txt.
cat app/wordcounts-00000-of-00001
This post will cover how to start creating your first Apache Beam application in Java.
Summary
In this post, we set up a simple Apache Beam application in Java with Gradle and confirmed the app successfully read Sample.txt and write the contents to an output file with the specified name prefix wordcounts-.
This is the beginning of the Apache Beam journey. Let’s write some more logic in the next step.